Saturday, March 31, 2012

Surround, continued.

The shower surround has been a slow process, to put it mildly. A few weeks ago, we started the tiling process, which included a line of glass tile with an iridescent finish.

That is probably the best picture I have  showing the accent tile color and finish. It's so pretty in person, but it's thrown a wrench in my plans!

In a rare moment of decisiveness a week ago, I grabbed a gallon of paint I loved in the store, but next to this it looked too blue.


In the store, the blues in the tiles were more present than they are in the bathroom itself, leaving me not liking the look of this paint next to the tile. The paint is much paler in the bathroom than it looks in this swatch, but it's still not working for me. So it's back the the drawing board with paint, and though my natural inclination is to go green, I also wonder if there's some other color out there that would make me change my mind. I worry that just going with green means the other hues in the tiles won't be picked up at all.

But before I can let myself go down the road of endless paint samples again, I have to finish the tiling. I'm happy to say, we're getting there.

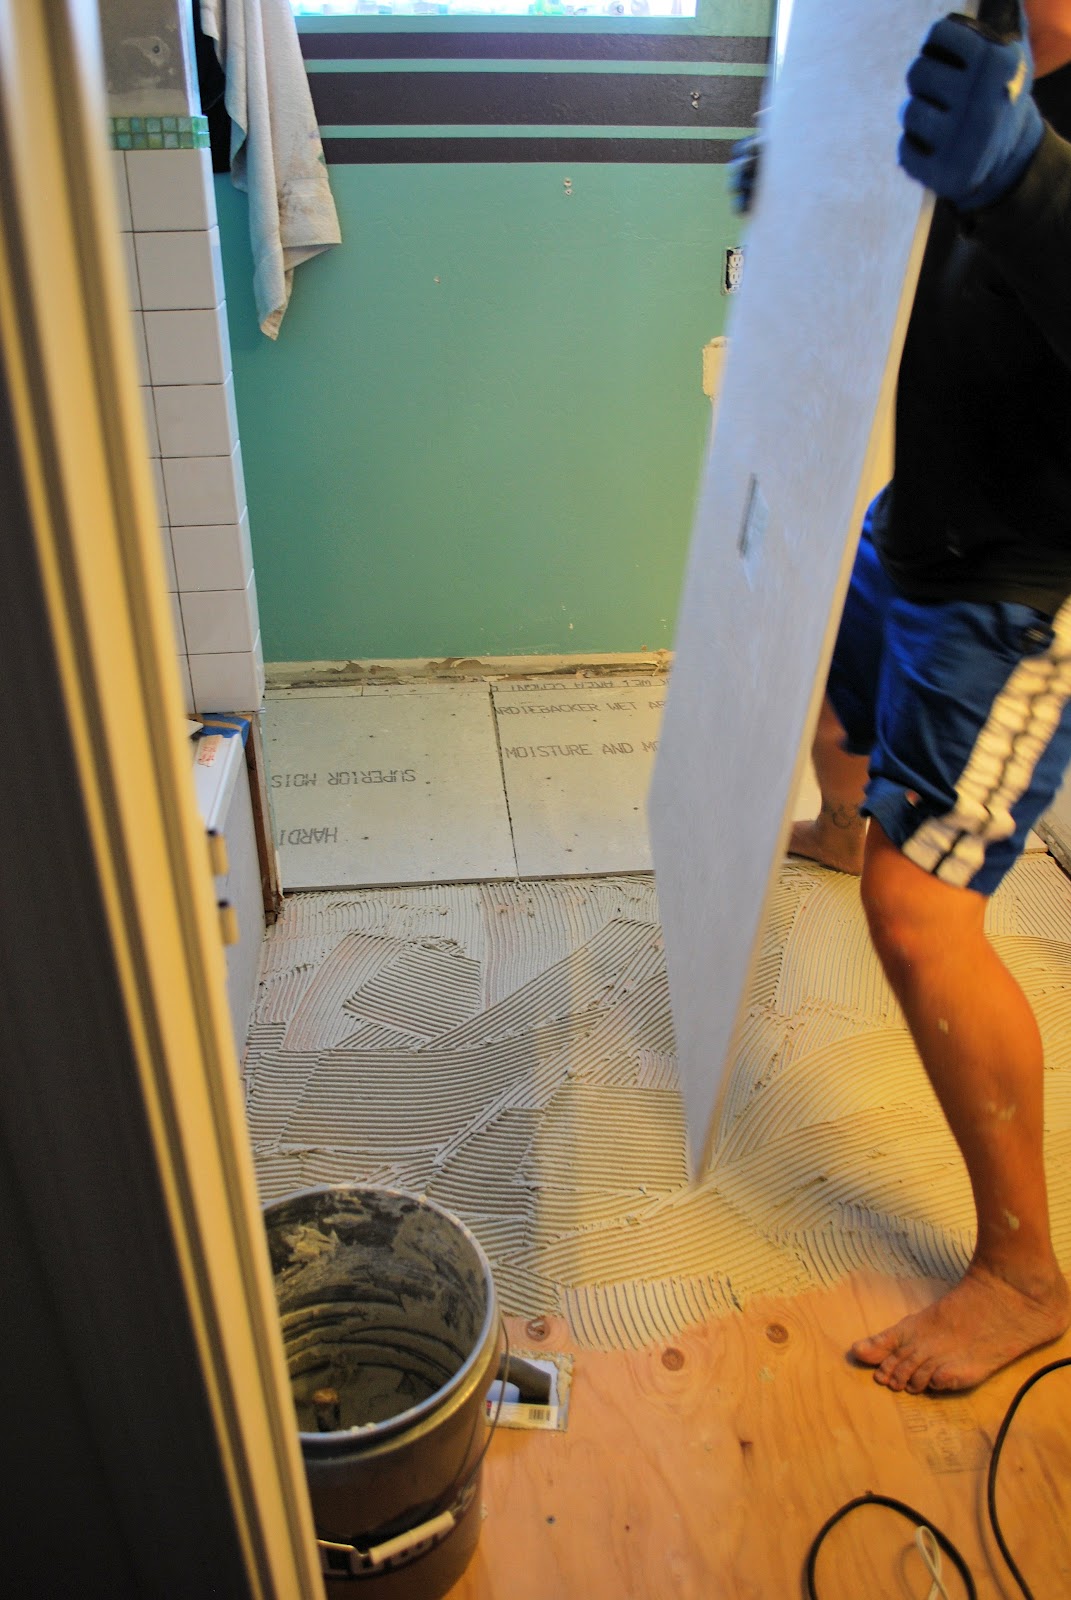
Tiling is a slow process, and it's made slower by the fact that there are some cuts necessary on each row, meaning I can't tile when the kids are sleeping or at night, since the tile saw gets set up outside and it too loud to run at those times. Sadly for me, the first row we needed to lay down after installing the corner shower shelves involved several cuts, both around and above said shelves, so it was put of until today. The tiling process itself is pretty simple once you get the hang of it. It starts with using a putty knife to slap some of the adhesive on the area you're going to tile. I think of it like icing a cake, where you put a glob on and then spead and smooth it as needed.


Once it's up, you use a notched trowel to smooth it and create grooves. We 'back butter' our tiles, meaning we also put some of the adhesive on the tile's back to make sure it adheres.


Then you line that tile right up and stick it in place. It can be moved around or even taken off for a while, so in some cases I put down a few tiles, add those little spacers where needed, and shift things a bit here and there. This was the tile on the endcap of the wall separating the bathtub from the toilet area. We used bullnose tiles on the end of the wall as well as on the endcap for a nice smooth finish.

We also did some rows, which can go quite quickly when the cutting is minimal.

Spreading on the adhesive.

Using the trowel to make lines in it. (I later realized that going vertically with the lines was easier and created a smoother, more even surface. You want to have grooves, but you ideally want the thickness to remain about the same everywhere because the tile sort of sits on top of this - as opposed to being pressed firmly INTO it - and consistent application means the tiles all sit flush more easily.)

Placing and spacing the tiles. It's usually recommended to use a stair step pattern or do one complete row across at a time so you lessen the chances your tiles will end up crooked. I've tiled before, so I felt ok doing a few partial rows (avoiding cuts since this was at night) and then checking the vertical and horizontal lines every once in a while with a level.

You'll notice there are no spacers below the glass tiles. Once they set for a few hours, it's pretty safe to pull out the spacers and use them in a new row rather than buying enough spacers for every row to have them where needed. I leave any spacers that are holding a space that doesn't feel 100% secure to me as long as possible. You can't really see it here, but as you lay a row horizontally, you typically set the tile about where it goes, then set a spacer in the corner of the tile and the three around it (they are shaped like a + sign, so in those corners to just push the spacer right up between the 4 tiles rather than having it stick out like those you see here. You can see a better picture of what I mean at this link.)Then I put 1-2 spacers between the bottom of that tile and the top of the tile below it, and last I add 1 or 2 between the tile and the one next to it.

To remove the spacers laying float in the corner of 4 tiles, I take a small knife and slide it between the tiles, then pop out the spacer.

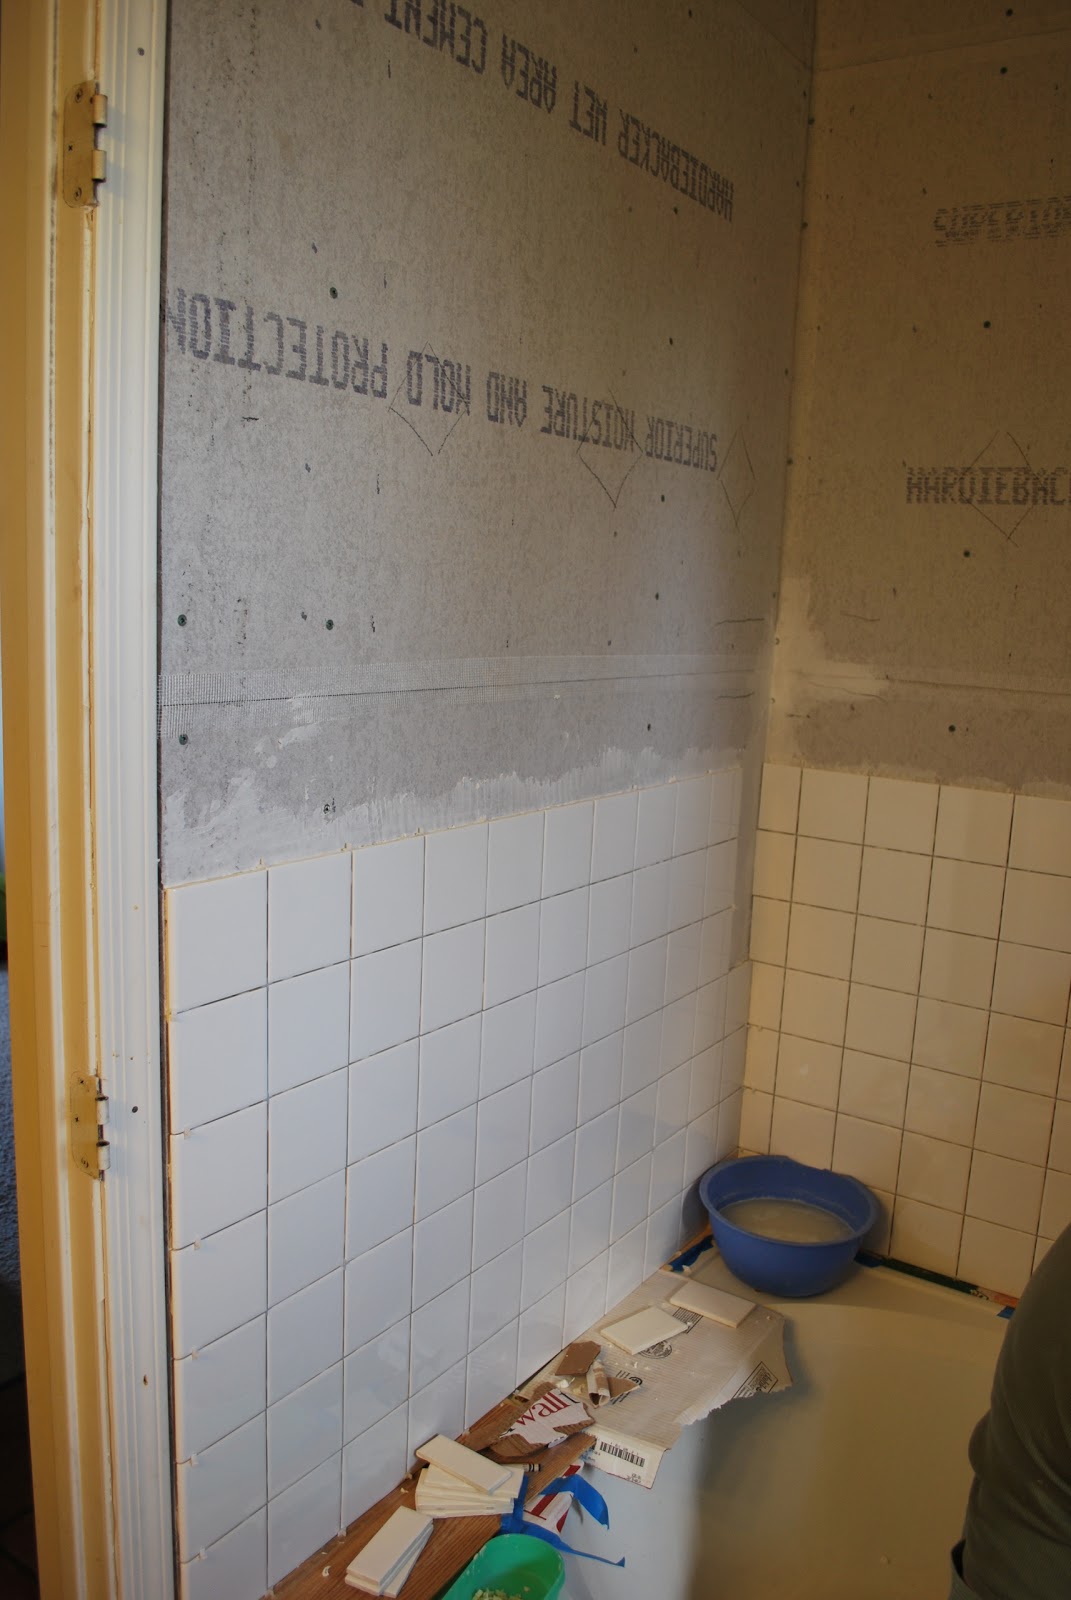
After a few more hours of work, I was here:

After this picture I took a long break to hang out with the family, then added 3 more rows. We're tiling to the ceiling, so there will be at least 4 more rows of white tile and possibly another accent row, though that's still up in the air.

I'm just happy it's starting to really come together now.


Thursday, March 29, 2012

More to Come.

I actually have quite a few posts to write, but I'm in the midst of work drama, so for now....just a picture:


My two blonde loves and their BFF.

Thursday, March 22, 2012

I Work Too Much.

I work too much, which is why all my posting is about the bathroom renovation and nothing else. Work. Family time. Bathroom renovation. Usually in that order.

I can interrupt this regularly scheduled bathroom update post to share something adorable: Mo's newest phrase. Whenever he wants something and you ask him to wait he says, "It's going to take you a couple whiles!" I love it. Who knows what a 'couple whiles' is, but in kid-land it must be for-e-ver.

So, back to the bathroom. Last weekend we tiled, so the next step was grout. Grout, grout, beautiful grout. After much research over the best kind of grout for our needs (second floor, bathroom) and out upkeep interests (minimal), we opted for Laticrete SpectraLOCK, which was super expensive but is supposed to last and stay beautiful forever. I was all ready to do the grouting, gloves on and mix ready to open, when Darrick ran upstairs and insisted that since he's grouted before he should do the work and I should mix the packages as we went. I was annoyed with this change of plans, but I gave in and handed him the grout float and the first bucket.

Best. Decision. Ever.

It took near an hour for him to spread this stuff in our tiny bathroom (about 65 square feet), and when all was said and done his palms had plenty of blisters. The thing about this stuff is it lasts forever, so it's a bitch to put down.

"So, was it worth it?" you ask.


I would give that question a Hell Yes answer.

Once the grout was spread into the gaps between tiles, I followed up with a big bucket of water + white vinegar and a sponge and cleaned the excess off the tiles using big circles. I started near the toilet area where Darrick had started the tiling and I was very happy to see that as I ran the sponge over the grout lines the grout became really smooth. About 40 minutes later, we cleaned it again in the same method, and then the next day Darrick did one last pass.

Beautiful.

With the floor done for now, we wanted to revisit the bathroom cabinets we have had sitting in our dining area for over a week now. In part because we wanted to see how they were going to work out, and moreso because Mo's birthday party is at our house this coming weekend and I wanted them upstairs and out of the way. Once we carried it all up, however, our suspicions were confirmed and we realized we needed to rebalance the frame we built to go under each cabinet. Luckily Darrick figured out we could just back out the screws that were in place with the drill, set everything up, and then re-screw it all back together nice and level.

A close up of the cabinets. You can see the line between the body of it and the riser here. We'll touch up with some caulk and cover those screws when it's all done.


This side of the cabinet is streaky, but this one will actually go against the wall. You can see where the old countertop backsplash landed (where the wall goes from whiteish to greenish), which is just about the height the cabinet is at now.
The happy carpenter?

We are happy with this height and how we think it'll look when it'd done. We need to move the plumbing connections up a few inches, reattach the doors and drawer fronts, and choose counter tops. When we do that last step, we may need to make a change to the big mirror on the wall as well. I'm leaning toward removing it and replacing with two smaller mirrors, then putting some kind of shelving between the cabinets. Darrick is leaning toward keeping it and either moving it up a few inches (so the backsplash doesn't overlap it) or using a special saw his parents own (with a diamond blade) to trim some inches from the bottom. Time will tell where we land, I guess.

The last time I updated our to-do list we added quite a few things to it, and it's grown even since then:

- Call insurance and file claim
- Remove baseboards
- Remove toilet and cover hole
- Remove tile
- Remove subflooring below tile
- Remove flooring BELOW subflooring.
- Remove tub surround (also involves removing showerhead and closing off that pipe)
- Pull out and discard tub (also involves removing and covering drain into floor)
- Have insurance assessor look at damage and determine if it's going to be covered by insurance
- Cut away water-damaged drywall in garage ceiling
- Put in new insulation and replace drywall.
- Potential repair/replacement of subflooring in bathroom
- Potential refinishing of cabinets
- Sand, stain, buff, and poly cabinets, doors, and drawers
- Build risers to increase height of cabinets
- Buy new counter tops and faucets for cabinets
- Move sink plumbing on both sides to accomdate taller cabinets
- Move, replace, or cut down mirror to accomodate new taller cabinets
- Replace layer of plywood on subfloor, sealing together with Liquid Nails
- Install Hardi Backer over floor plywood with mortar and screws
- Install new tile
- Grout new tile
-  Fix pipes below floor level for toilet
- Replace toilet flange and put in new toilet
- Removal of current counters and cabinets
- Removal of hardware (towel rack, light plates, etc.)
- Spray paint bathroom hardware to brushed nickel
- Buy new globes to cover bathroom lightbulbs
- Spray paint light fixtures to brushed nickel
- Spray paint cabinet hardward brushed nickel
- Clean ceiling to prepare to paint
- Repaint bathroom ceiling and walls
- Move existing drain and pipes for bathtub to accomodate new height of tub
-Move showerhead up 6"
- Build support box for tub to sit in
- Installation of new tub and surround
- Buy and install new waterproof drywall for shower surround
- Tile new shower surround
- Tile front of tub
- Hook up plumbing to bath and shower
- Paint room
- Reinstall fixtures on walls
- Reinstall bathroom lights
- Installation of cabinets (either refinished old ones with risers or new ones)
- Paint and install new baseboards OR use tile as baseboard
- Installation of countertops (either current one or new)
- Put in new faucets
- Add new shower curtain and bath mats and toilet paper roll
- Look into storage options in room


Sunday, March 18, 2012

Flooring. Finally.

This weekend, we finally saw some appreciable progress in our bathroom, and it was all thanks to some flooring we were finally able to install.

But let me back up first. Because before we could put in new tile, we had quite a bit of prep work to do. We had already taken the backer board off the floors when we removed the tile, but there was a layer of pressboard down as well. Our original plan was to keep that and build tile on it, but after doing some research we realized that wouldn't fly. First, that layer had some water damage, especially in the toilet area. Second, we read up quite a bit and discovered that, especially in a 2nd floor bathroom, it was strongly recommended that we add Hardibacker under the tile.

So up that floor came. And once it was up, we realized some water damage around the toilet's underfloor plumbing necessitated removing a square of the subfloor and replacing it with more sturdy plywood. Quite simply, the condition of the subfloor couldn't be trusted when the time comes to replace the toilet. The toilet has a ring that screws into the floor, and the subfloor would be too soft to guarantee a tight fit once that ring was drilled and screwed into the floor.

You can see here that my husband cut out a nice square section of the subfloor and then cut a piece of plywood to fill the space. To be extra sure the floor area below the toilet was sturdy, he also created a frame out of 2" x 6" wood so he had good, solid places to screw everything together. He also had to do some pipe repair below floor level.


The rest of the subfloor had some water damage in that area, but everyone we talked to recommended leaving it and just replacing the area around the toilet because large pieces of subfloor are more sturdy than several pieces puzzled in together.


As you can see, Rohan was very helpful to the process. Once Darrick had the piece secured, he tried the metal portion to be sure it was going to position correctly and would be long enough to sit securely in the pipe below once the next 3 layers were placed. Yes...I said THREE layers.

With that complete, we moved on to another layer of plywood, cut to fit the room. This layer was affixed with the help of some liquid nails. Part of the reason for this is that you don't want to leave it floating unsecured under all the other layers in case it might shift. The other reason is that you don't want the squeak of plywood against plywood when walking through the room. Once that was in and set, the last layer was Hardibacker, set onto the plywood with mortar and then screwed into place. When that was all done, Darrick also had to use Hardibacker tape to cover the seams, which were finally finished off with a thin layer of mortar 'mudded' over them.


Seriously, this is when I consider myself very lucky to have a husband who is skilled with remodels and strong enough to do most of this himself. There's only so much a second person can do to help in this process, and more often than not I was in the way. Which is why he did all that while I did some of this:


About 24 hours later, everything was cured enough for us to start on the tile. We used a mortar with a high latex content, and also used an additive intended to give it some flexibility. This is really important on a 2nd floor because the floor has to have some 'give'. The donwside was that it was a little harder to work with and firmed up quickly, so we had to be careful to make our measurements and cuts quickly and to only mix half the bag at a time so it didn't all dry out on us.

We spent a good chunk of time deciding how we wanted to tackle the room, especially in terms of snapping chalk lines to keep a straight line going from the doorway to the back wall and in terms of deciding where the full tiles needed to be. Once we decided that, we set to work. Darrick applied the mortar to the Hardibacker and used a trowel to create the rivets needed, and I ran up and down the stairs using the tile saw to cut pieces and then coming back into the room to back-butter the tile pieces and hand them over so he could set and space them.

All told, tiling the room took about 3.5 hours from start to finish, which included a run to Home Depot for more tile and lots of 'help' from the kids who had 1,456,672 questions and ideas for us. And when it was done, we stepped back, admired our work, and then showered and went out to drink.


That last picture is turned the wrong way, but gives and idea of how we handled the doorway.

Today, a full 24 hours after we finished tiling, we went back through and cleaned the excess mortar from the tops of the tiles and shop vac'd the room. Next up is grout, then once that's set for about 72 hours we can paint the ceiling and walls and figure out positioning of the cabinets and get new countertops.


Updating Our Nightstands.

Many years ago, around the time Darrick and I bought our first house together, we were in need of nightstands. We didn't have much money - or any money, really. So we hit some thrift and second hand stores, and walked out with two dark wood tables that were very solid and very ugly.

I once painted them white, except I didn't know anything about painting wood furniture and I never painted the drawers. The result was chipping white paint and dark wood drawer fronts. Not a good look, admittedly, but for years we just tossed fabric over the top of them and ignored their ugly factor.

But then I fell in love with brushed nickel spray paint, and one day in the midst of bathroom renovations, I had an idea. A silly, unapproved-by-the-husband idea.

I removed the drawer of the first nightstand (his, since he was starting spring break and therefore didn't need a bedside alarm clock or lamp for a week or so) and carried the table itself downstairs.

And, have I mentioned how much we let the backyard go to shit in the renovation process? Until sometime this week it was littered with tools, a toilet, wood, scraps of things, cabinets, stains, paint cans and more.

Anyhow, I set this guy in our yellow winter grass and went to work. I cleaned it and let it dry, then sprayed it with several (and I do mean several) thin coats of spray paint. All told, it took 2 cans of spray paint to thoroughly coat the table and drawer.


I also removed the old handle from the drawer. It only used one of these holes, and the new handles I wanted to put in its place didn't fit in these pre-made spots, so I caulked one of the holes and let Darrick drill a second one in the correct place. Curious why I decided this needed a new handle?


Yeah. That's why.

When all was said and done and 2 cans of spray paint had been applied and new handles were in place, I left it outside for about another 3 days just be sure it had aired out thoroughly and wouldn't make the house smell like spray paint. And then I carried it up and put it back in its place. The great thing about this project, other than the low cost and marked improvement in appearance, is that moving it out and back in inspired a deep cleaning in the bedroom, complete with shop vac'ing the carpets. All for this:


Kindly ignore the builder white walls (those are next on my agenda once the bathroom is done, since it's the master bath we're remodeling) and the mattress with no sheets (laundry day), and focus on the pretty!

The biggest surprise in all of this? My husband loves it! He was worried it was going to be too sparkly or feminine, but the result is more a steely gray color with a tiny bit of sheen to it when the light hits it right. I'm in love, and can't wait for the second nightstand to be done!


Saturday, March 17, 2012

THREE!

Friday was Rohan's birthday. He's three now. THREE. It's so...not a baby. I'm not sure I'm ready for that, you know?


He is everything good a mom could wish for: smart, funny as hell, so kind, protective of those he loves, gentle in spirit, cute, cuddly, tender and wild and free. He's amazing in so many ways, and he has brought so much joy into our lives in the past 3 years. I could never have imagined the joy and intense happiness he brings into our home and our family.

Not only is he the world's sweetest boy, he's the bravest and most good natured as well. You can see his right wrist is wrapped in this picture. He was burned at a restuarant by hot water a week before his birthday, and sustained 2nd degree burns that required treatment by urgent care, then his pediatrician, then the burn center at Maricopa Medical Center. He had to have his wound 'debrided twice a day (we soaked him in the tub for about 20 minutes, then had to wipe the area gently with a cloth to remove the film that would form over the burn as it healed), which I KNOW hurt like hell. He had to sit on a hospital bed surrounded by strangers and have multiple people inspect him and eventually remove his blisters and wrap his arm. He couldn't climb into his own car seat, pull down his own pants to go potty, or hold anything with his right hand. And yet, he almost never complained. Not only did he let the doctors and us do everything we needed to do to help him heal (and elicited major compliments and swooning from every medical professional he flirted with along the way), he really blew me away with his generous heart. At the hospital, a staff person came in with toys to entertain/distract him, and one toy included his choice of stuffed animal to be his 'patient': a pink kitty or a green bird. He chose the kitty, holding it and dressing its imaginary wound, and to our surprise the staff said it was ours to keep. We left from the hospital to get Luca at preschool, and he handed that pink kitty right over to her, telling me he picked it because he knew his sister would like it, and he wanted her to keep it.

What kind of 2 (almost 3) year old kid is that selfless and thoughtful and generous? Mine.

Happy 3rd birthday, big guy. From the day you swam into our lives you've made our world brighter, sweeter, and more fun.

Sunday, March 11, 2012

That's Amore.

**formatting is weird on this post, and I can't seem to fix it**

This morning by 7:30 the kids were sitting at their little table eating cereal, coffee had been brewed and I was running a load of dishes, and my mother in law was upstairs in my bathroom, doing this:


While I was in D.C. two weekends back, Darrick and his step dad spent a good chuck of time ensuring the bath faucet was installed properly and putting up a layer of underlayment particle board and Hardiebacker on the short walls around the tub. Initially we planned on just using 1 layer of Hardibacker on each wall, but that left too big a gap between the Hardiebacker and the tub lip, so doubling up was a necessity.

 Last weekend we didn't have time to do any substantial work, so we called in reinforcements in the form of my mother in law for today. She showed up ready to work, and since she's tiled a few shower surrounds in the past we were happy to hand over the tiles and let her take the lead.

The first few rows are the hardest. Because our tub sits on a frame made of wood, the sides bow down a bit and the corners are higher. That meant we needed to put shims in below the first row and very carefully lay those tiles so they were level and not necessarily lined up with the top of the tub. The back wall went in first, then the side walls, starting with the bottom two rows of each. Once those were in, we did some cuts to fill the space around the faucet and where the handle will be. This was, by far, the most time consuming part of the day. Once that was done, I joined my mother in law in the bathroom to help her. I took the short wall that houses the faucet and she did the installation of the bullnose pieces that wrap around that wall. You can see below where we did that. We opted to wrap around with bullnose pieces rather than end the tile on that wall and use edge pieces because it was easier overall. Using edge pieces would have required us to put in a metal or plastic strip on the corner where the drywall meets the Hardibacker, and also would have meant patching the drywall and texturing.


Once we made it up to a height we'd pre-agreed upon, it was time to add our corner shelves. These were made by the same company that makes the wall tiles, which is great because it means the finish is the same and they are made to fit in with the wall tiles. We used a lot of the tile adhesive to affix the shelves to the Hardibacker directly, then left it alone for about an hour.


And THEN....we did this!


::swoon:: Isn't it pretty?!?!

These little glass tiles are from Home Depot, and I'm officially in love. We originally bought it with another use in mind, but staring down that wall and imagining it all white made me change my mind. These tiles are mounted on an adhesive plastic, so all we had to do was use a blade to cut them into rows two high. The non-adhesive side is placed onto the Omni mix and then you let it sit for at least an hour before removing the plastic.


For that little section of wall below, I popped the tiles off the plastic and applied them individually. This space was too small for 6 tiles across, but too big for 5 unless I hand-placed them spaced out a bit more than the others.


Annnnd...Taaaa Daaaaaa!!!!


It's only about halfway done, of course, but I'm so happy with the progress we made and how well it's going so far.


Thursday, March 1, 2012

I'm Falling Behind.

On running. (Eek! Pat's Run soooo clooooose)

On housework (Hello, giant mountain of laundry to hang and put away!)

On the meditation challenge.

On grocery shopping.

On blogging.

On writing that book I want to write.

On plucking my eyebrows.

On work.

On fun.


I spent 4 days in Washington, D.C. this past week, and I'm mentally and emotionally exhausted. But, oddly, more sure of the things that matter to me in life and more able to define my work than ever before.

I visited the Hill. I bit my tongue when an old man on the plane warned my friend and me not to 'turn into Democrats' during out visit, chalking it up to old people cluelessness. Plus, he had adorably oversized ears and a huge belt buckle. And anyone who knows me well knows I have a soft spot for sweet, clueless old men.

I visited the Holocaust museum for the first time. It has been on my list since my first visit in 2006, and this week I checked off that box. I even got hit on while touring the 4th floor, which was mildly flattering but more so disconcerting and sort of creepy.

I saw people I've come to consider good friends thanks to a common profession and regular conference run-ins. I drank too much rum and danced with other people, whom I consider good friends because they are. Because we've shared offices and desserts and jokes and life stories. Because we've cried in front of each other and held space to witness each others' successes and challenges and heartbreaks and joys. I got a shout-out from a professional woman I admire greatly. I was invited to a very small and, in my mind, prestigious meeting with a federal agency. I ran after a woman in the hotel lobby who had come to the conference to share her personal story, just so I could thank her for the bravery and power of her words. I listened to a keynote speech that made me tear up with the power of humanity.

And then I came home. I walked onto the curb outside of the terminal and from the backseat of my mom's truck I saw two bright eyed kids practically pouncing out of their seats at the sight of me. We held hands the whole way home and when I put them down to nap I eagerly waited for them to wake. When Rohan crawled in beside me at night, stealing my covers and my physical space, I huddled into his warmth and felt his hair brush my face and I begged my body to stay awake a little longer so I could breathe in his sweetness.

I woke up surrounded by blonde hair and peach-soft cheeks and wanted to freeze that moment.

I am behind on cuddles and kisses and story time. I am behind on glitter and markers and bottles of Elmer's glue. I am behind on soccer practice and couch cuddle puddles and popcorn and hot chocolate.

But I am full up on contentment and love.

LinkWithin

Blog Widget by LinkWithin