But let me back up first. Because before we could put in new tile, we had quite a bit of prep work to do. We had already taken the backer board off the floors when we removed the tile, but there was a layer of pressboard down as well. Our original plan was to keep that and build tile on it, but after doing some research we realized that wouldn't fly. First, that layer had some water damage, especially in the toilet area. Second, we read up quite a bit and discovered that, especially in a 2nd floor bathroom, it was strongly recommended that we add Hardibacker under the tile.
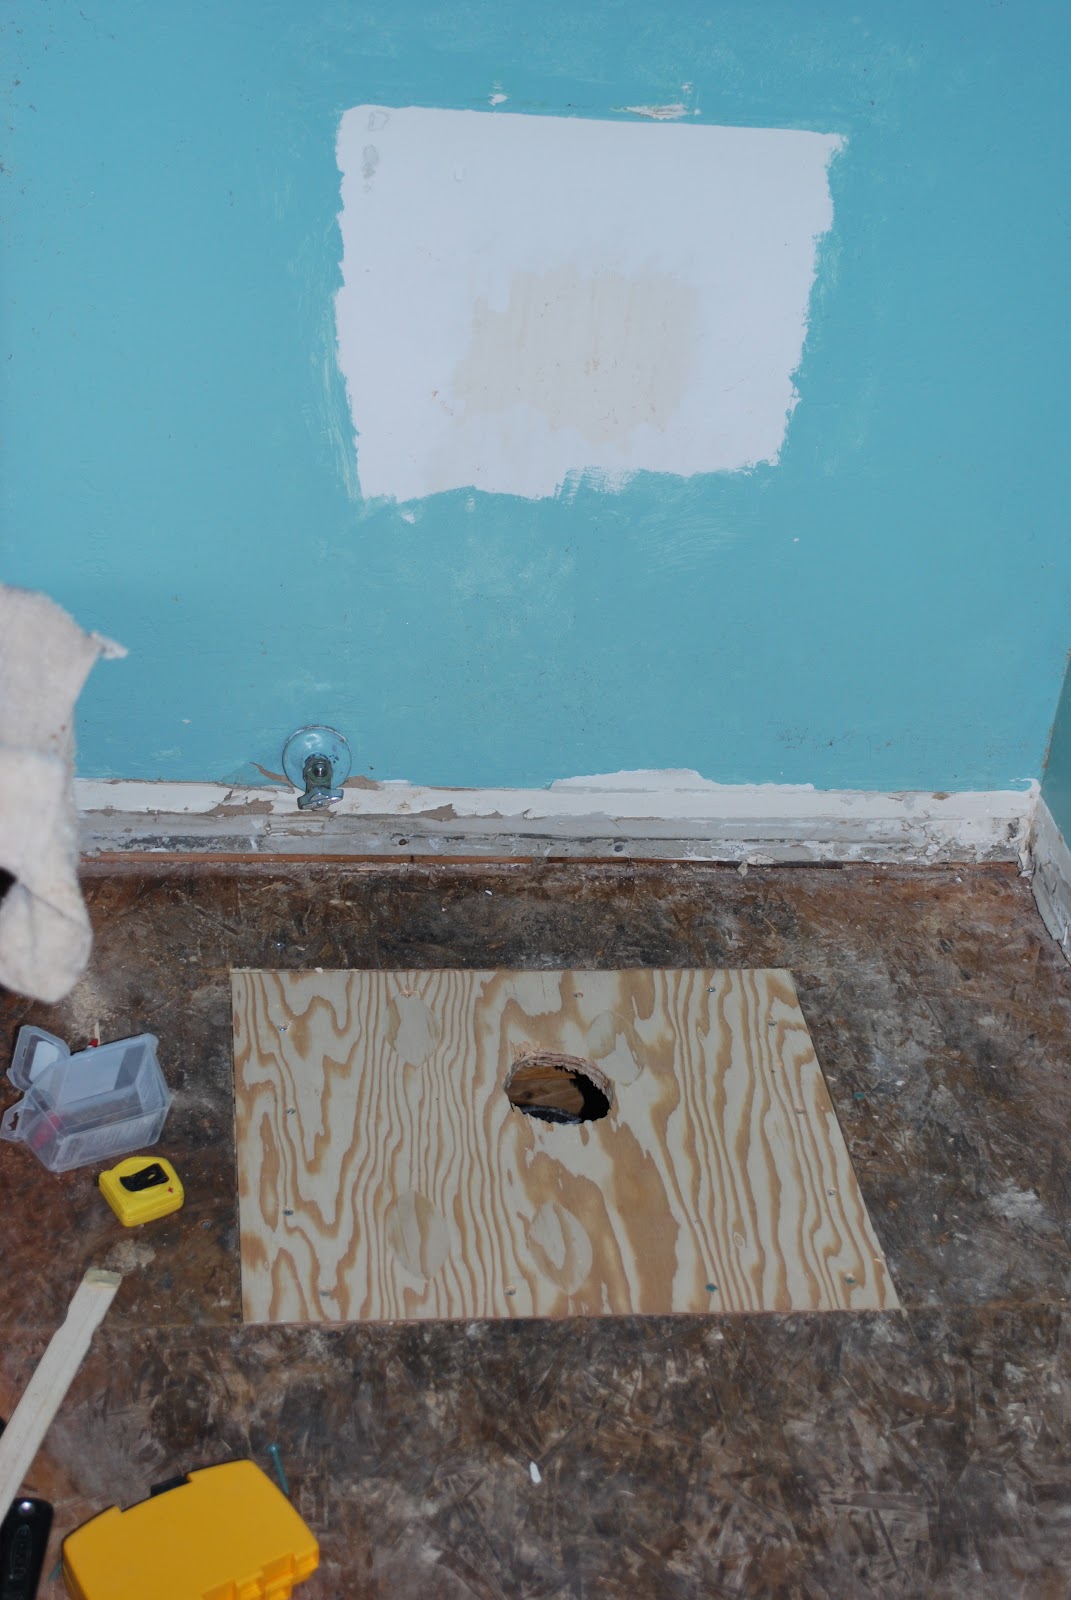
So up that floor came. And once it was up, we realized some water damage around the toilet's underfloor plumbing necessitated removing a square of the subfloor and replacing it with more sturdy plywood. Quite simply, the condition of the subfloor couldn't be trusted when the time comes to replace the toilet. The toilet has a ring that screws into the floor, and the subfloor would be too soft to guarantee a tight fit once that ring was drilled and screwed into the floor.
You can see here that my husband cut out a nice square section of the subfloor and then cut a piece of plywood to fill the space. To be extra sure the floor area below the toilet was sturdy, he also created a frame out of 2" x 6" wood so he had good, solid places to screw everything together. He also had to do some pipe repair below floor level.

The rest of the subfloor had some water damage in that area, but everyone we talked to recommended leaving it and just replacing the area around the toilet because large pieces of subfloor are more sturdy than several pieces puzzled in together.


As you can see, Rohan was very helpful to the process. Once Darrick had the piece secured, he tried the metal portion to be sure it was going to position correctly and would be long enough to sit securely in the pipe below once the next 3 layers were placed. Yes...I said THREE layers.
With that complete, we moved on to another layer of plywood, cut to fit the room. This layer was affixed with the help of some liquid nails. Part of the reason for this is that you don't want to leave it floating unsecured under all the other layers in case it might shift. The other reason is that you don't want the squeak of plywood against plywood when walking through the room. Once that was in and set, the last layer was Hardibacker, set onto the plywood with mortar and then screwed into place. When that was all done, Darrick also had to use Hardibacker tape to cover the seams, which were finally finished off with a thin layer of mortar 'mudded' over them.


Seriously, this is when I consider myself very lucky to have a husband who is skilled with remodels and strong enough to do most of this himself. There's only so much a second person can do to help in this process, and more often than not I was in the way. Which is why he did all that while I did some of this:


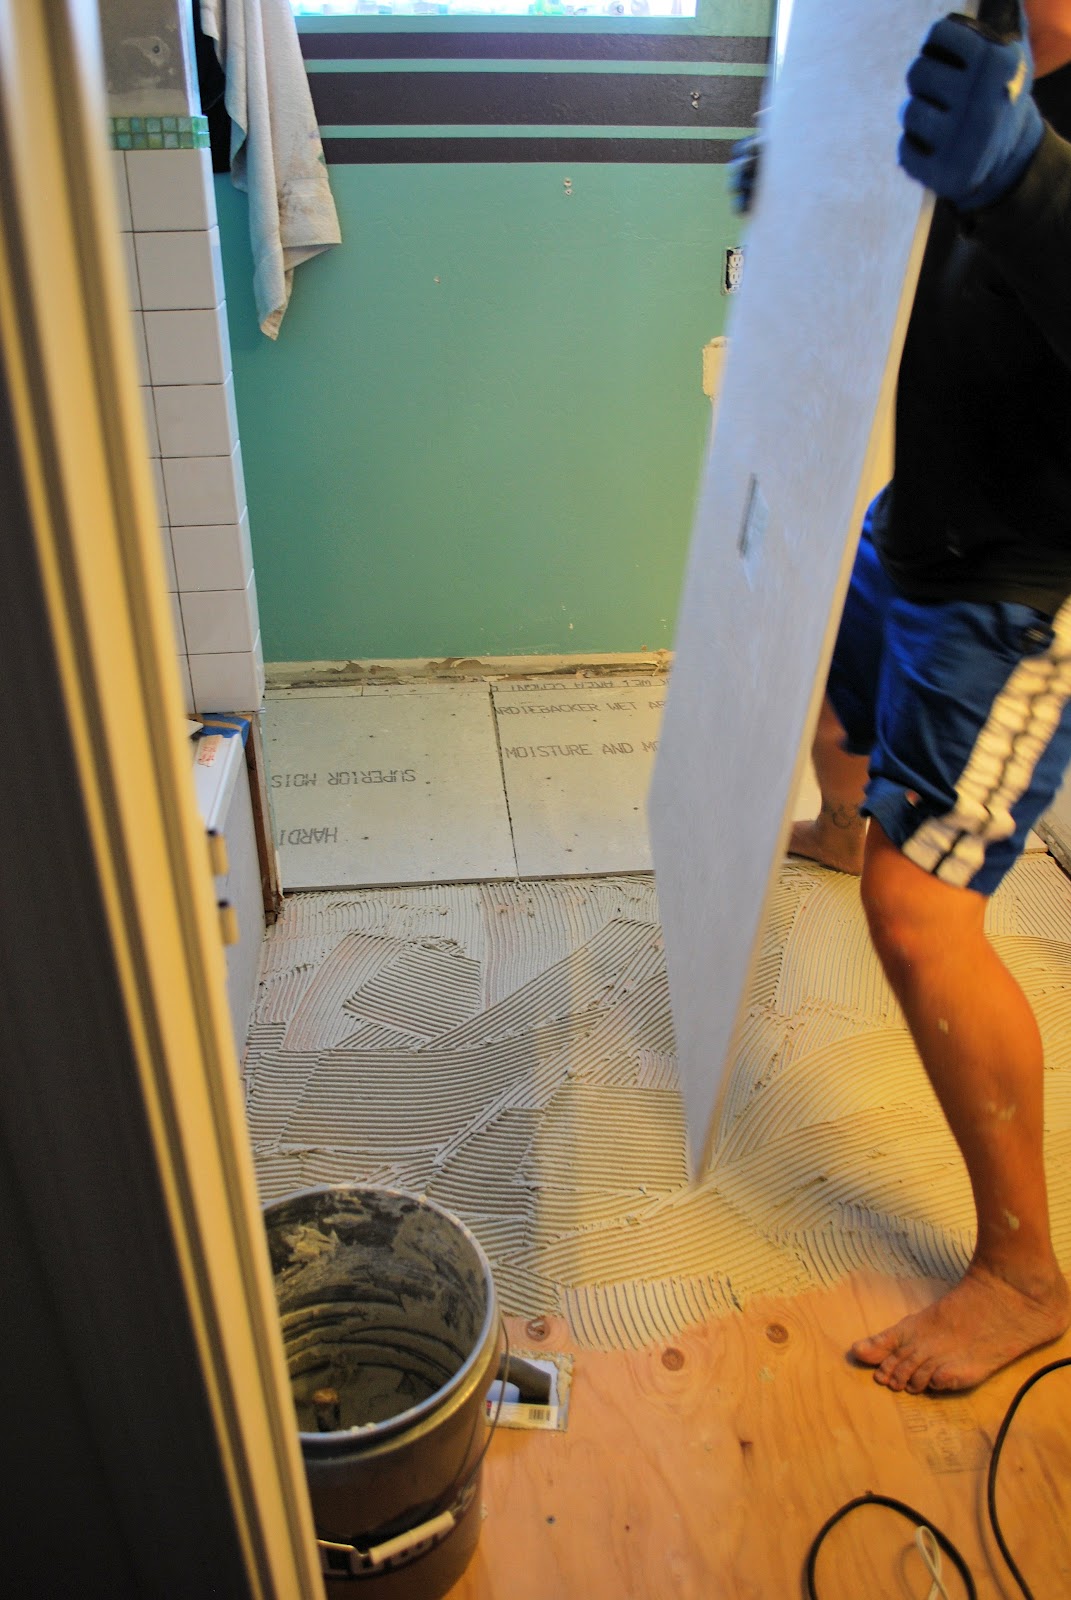
About 24 hours later, everything was cured enough for us to start on the tile. We used a mortar with a high latex content, and also used an additive intended to give it some flexibility. This is really important on a 2nd floor because the floor has to have some 'give'. The donwside was that it was a little harder to work with and firmed up quickly, so we had to be careful to make our measurements and cuts quickly and to only mix half the bag at a time so it didn't all dry out on us.
We spent a good chunk of time deciding how we wanted to tackle the room, especially in terms of snapping chalk lines to keep a straight line going from the doorway to the back wall and in terms of deciding where the full tiles needed to be. Once we decided that, we set to work. Darrick applied the mortar to the Hardibacker and used a trowel to create the rivets needed, and I ran up and down the stairs using the tile saw to cut pieces and then coming back into the room to back-butter the tile pieces and hand them over so he could set and space them.
All told, tiling the room took about 3.5 hours from start to finish, which included a run to Home Depot for more tile and lots of 'help' from the kids who had 1,456,672 questions and ideas for us. And when it was done, we stepped back, admired our work, and then showered and went out to drink.


That last picture is turned the wrong way, but gives and idea of how we handled the doorway.
Today, a full 24 hours after we finished tiling, we went back through and cleaned the excess mortar from the tops of the tiles and shop vac'd the room. Next up is grout, then once that's set for about 72 hours we can paint the ceiling and walls and figure out positioning of the cabinets and get new countertops.
No comments:
Post a Comment